
Discovering a crack underfoot can be unsettling. A cracked shower floor immediately raises concerns about leaks, water damage, and expensive repairs hiding beneath the surface. Those concerns are justified—moisture can travel quickly through even the smallest fracture. The good news is that not every crack means a full replacement. With the right evaluation, you can determine whether a DIY repair is safe or if professional intervention is the smarter long-term choice.
This guide explains how to assess risk, repair common shower base cracks correctly, and understand when expert services from RJG Group are essential to protect your home.
Cracked Shower Floor: How to Assess the Risk Before Repair
Before tools or repair kits come into play, the most important step is determining whether the crack is cosmetic or structural. Misjudging this can lead to repeat failures and higher costs later.
The 60-Second Stability Test
Start with a completely dry shower base. Press down firmly with your heel on both sides of the crack. A solid, unmoving surface typically indicates the crack is limited to the shower pan itself. This type of damage is often repairable with the correct materials.
If you feel movement, softness, or flexing, the issue is no longer surface-level. Floor flex means the base lacks proper support, and any patch applied on top will likely fail again. This is one of the most common reasons homeowners eventually call RJG Group after an attempted DIY fix.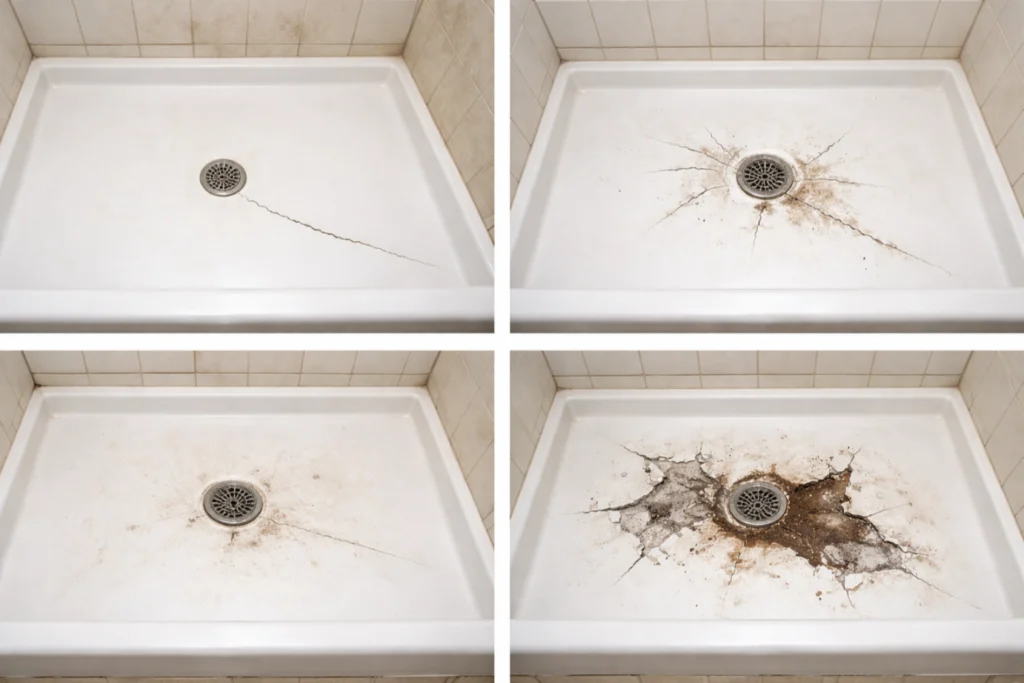
Cracked Shower Floor: Identifying the Shower Base Material
Repair success depends heavily on matching the solution to the material. Using the wrong filler or method can cause peeling, water intrusion, and worsening damage.
The Simple Tap Test for Fiberglass or Acrylic
Most non-tiled showers are constructed from fiberglass or acrylic. To confirm, lightly tap the surface with your knuckle. A hollow, plastic-like sound usually indicates these materials, which respond well to epoxy-based repair kits.
Tile or stone bases sound dense and solid and require entirely different repair methods. Applying a fiberglass kit to tile—or vice versa—will not create a lasting bond. Professional contractors trained to standards recognized by the master builders association understand these distinctions and repair accordingly.
RJG Group frequently encounters failed repairs caused by mismatched materials, which is why accurate identification is critical.
Cracked Shower Floor: Step-by-Step Repair and Prevention Guide
If your shower base is solid and made from fiberglass or acrylic, a careful repair can restore waterproof integrity. Preparation and patience matter more than speed.
Preparing the Surface for a Permanent Bond
Begin by thoroughly cleaning the crack and surrounding area with an abrasive cleaner to remove soap residue and oils. Rinse well and allow the surface to dry completely. Any moisture left behind will compromise adhesion.
Lightly sand the crack and the surrounding inch of surface using fine-grit waterproof sandpaper. This roughens the surface so the epoxy can mechanically bond. For best results, carefully open the crack into a shallow V-shape. This allows the filler to sit inside the crack rather than skim over it, creating a stronger repair.
Applying the Repair Compound Correctly
Mix the two-part epoxy according to the manufacturer’s instructions, ensuring a uniform color. Working within the product’s set time, press the compound firmly into the prepared crack, slightly overfilling the area.
Allow the epoxy to cure fully—usually 24 hours. Once hardened, sand the area smooth until it is level with the surrounding floor. At this stage, the repair should be watertight and structurally sound for normal use.
Preventing Future Damage
Most cracks result from either impact damage or insufficient support beneath the shower base. Avoid dropping heavy items into the shower and ensure weight is distributed evenly during use.
If cracks recur or multiple fractures appear, this often signals deeper support issues. RJG Group evaluates not only the visible damage but also the underlying structure to prevent repeat failures. Their approach focuses on long-term stability, not temporary fixes.
When Professional Help Makes the Difference
While some cracks are manageable, others indicate broader problems that shouldn’t be ignored. A professional assessment can prevent hidden moisture damage, mold growth, and subfloor deterioration.
RJG Group specializes in diagnosing shower floor failures, correcting structural support issues, and restoring bathrooms safely and correctly the first time. Their experience ensures repairs meet building expectations and protect the value of your home.

If you’re unsure whether your shower floor crack is safe to repair—or want assurance the job is done right—Contact us at RJG Group to schedule an evaluation and take the next step toward a secure, long-lasting solution.





 Defining Modern Excellence with Integrity


